What is needed to connect Arduino to a Loconet network?
Basically, you need a hardware interface. You can isolate and solder your own board because all schematics are public, or purchase it directly from Peter Giling at www.phgiling.net, and it's called GCA185 (all information here).
Check all information about the shield in this post.
Check all information about the shield in this post.

This board is designed as a shield for Arduino UNO, but if you want to use an Arduino NANO you have a new board named GCA50_AN:
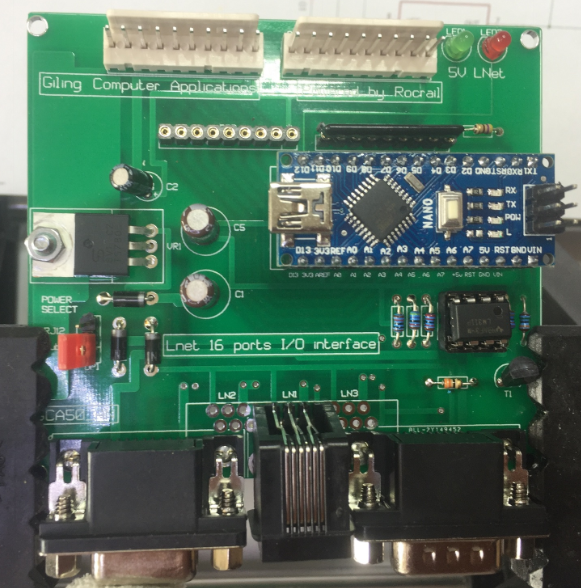
You can read my review of this board here (http://www.clubncaldes.com/2018/11/testing-peter-giling-gca50an-for.html), and check all information in Rocrail Wiki (https://wiki.rocrail.net/doku.php?id=gca50_an-en).
And from the software part, you can use MRRWA (Model Rail Roading with Arduino) libraries. Last version can be downloaded from their site: http://mrrwa.org
With those libraries you will get lots of interesting demo programs like a Loconet Monitor, a Throttle, a Control Panel or a Fast Clock among others. And with simple programming you will be able to make your own.
You can also access the github repository of Club N Caldes and download for free the programs we develop for our modules and layouts.
You can also access the github repository of Club N Caldes and download for free the programs we develop for our modules and layouts.
Build your own DCC command station with Arduino
Check this post to build your command station with Arduino. No soldering is required, and it will cost just 8$.
In this post we explain how to build a more advanced Command Station with Loconet interface.
And finally, our newer post is about a simple DCC command station based also in DCC++ project (without Loconet interface) but with display, keyboard and throttle support so no PC is required. And all for less than 20€.
Servo control module with frog polatization
Here you can see how to mount a Loconet servo module for 8 switches with frog polarization:
Loconet Outputs and Sound Module with LNCV configuration
Version 7.0: Go to THIS POST to see information and download software about version 7 of the sound and outputs module. This version has many improvements like independent volume configuration for each sound and background/main sound configuration.
Version 6.2: Go to THIS POST to download and check all functionalities. You can upload as many sounds as you want, assign each of them to an output number and play them through your throttle or software, and assign them to events in the layout like train arrivals or departures.
Version 1:
In this post you will find information and a link to download a program which converts your Arduino in an outputs and sound Loconet module. That's one of my firsts running projects and first version of this module.
Illumination system for your layout

Version 1: In this post I describe how to make an Art-Net receiver to manage some led strips to bring your layout to a new level, and have an ambient illumination and weather simulation worthy of Miniatur Wunderland. It's not necessary the Loconet shield for this module, just an arduino UNO, a cheap Ethernet shield and a 4 MOSFET board to drive one RGB led strip and one white led strip.
No comments:
Post a Comment